Configure TrenchBroom in Windows to create Quake maps
This guide will show you everything you need to do to get TrenchBroom up and running in Windows so you can create and compile Quake maps.
Table of Contents
Intro
I have previously written guides for how to set up TrenchBroom on Ubuntu to create original Quake maps, and TrenchBroom on Windows to create Quake II maps specifically, but not a Windows + original Quake guide, so here we go.
Downloads
Prerequisite: Microsoft Visual C++ Redistributables. Either download and install the VC++ redist packages on each of the below software links, or simply install via winget (if using Windows 11) in the Windows Terminal by using the following command:winget install -e Microsoft.VC++2015-2022Redist-x64
TrenchBroom - The 3D level editor. Download the latest Win64 Release .7z package. You will need 7-Zip to extract.
ericw-tools - The map compiler. Download the latest win64.zip.
vkQuake - The source port to play our maps. Download the latest win64.zip package.
Texture wad - this is a minimal texture wad to get us up and running. Other, more comprehensive wads are available around the internet.
Quake .pak files - You need to buy the full version of Quake on Steam or GOG (or find an old disc) to copy the complete pak0.pak and pak1.pak files into your \vkquake\id1\ directory from your Quake installation.
Directory structure
Now that you have everything downloaded, you need to make sure everything is in the right place.
For the purpose of this tutorial and to keep things simple, we will set everything up in C:\quake\.
Let's create a skeleton directory structure that looks like the below:
\quake\
\ericw-tools\
\trenchbroom\
\vkquake\
\id1\
\wad\
Extract each package you downloaded and put it in the corresponding directory.
TrenchBroom configuration
Game configuration
Now it's time to open the TrenchBroom.exe from Windows Explorer at C:\trenchbroom\TrenchBroom.exe
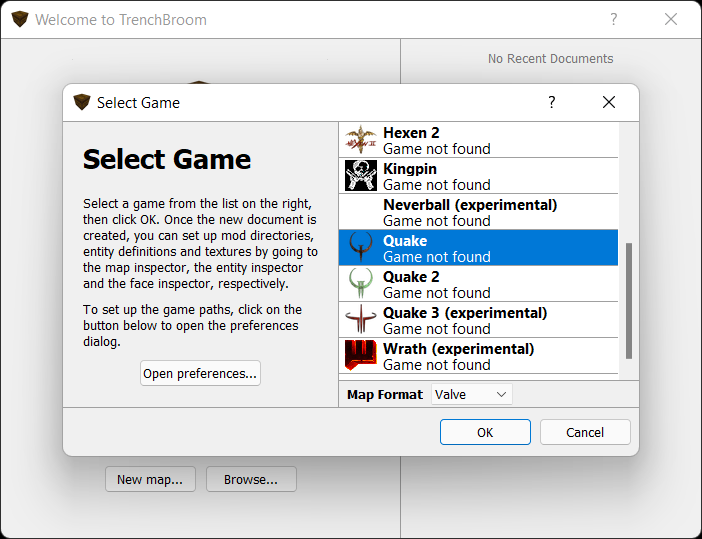
Next the TrenchBroom welcome screen will appear. Here you just need to click "New Map".
The "Select Game" window will appear, at which point scroll to select Quake and then click "OK".


You will now be taken to a blank TrenchBroom map.
There is more configuration to do however, so navigate to View -> Preferences to open the game preferences screen.
Select Quake and enter in C:\quake\vkquake for the game path, and then click the "Configure engines..." button and point to the vkQuake.exe.
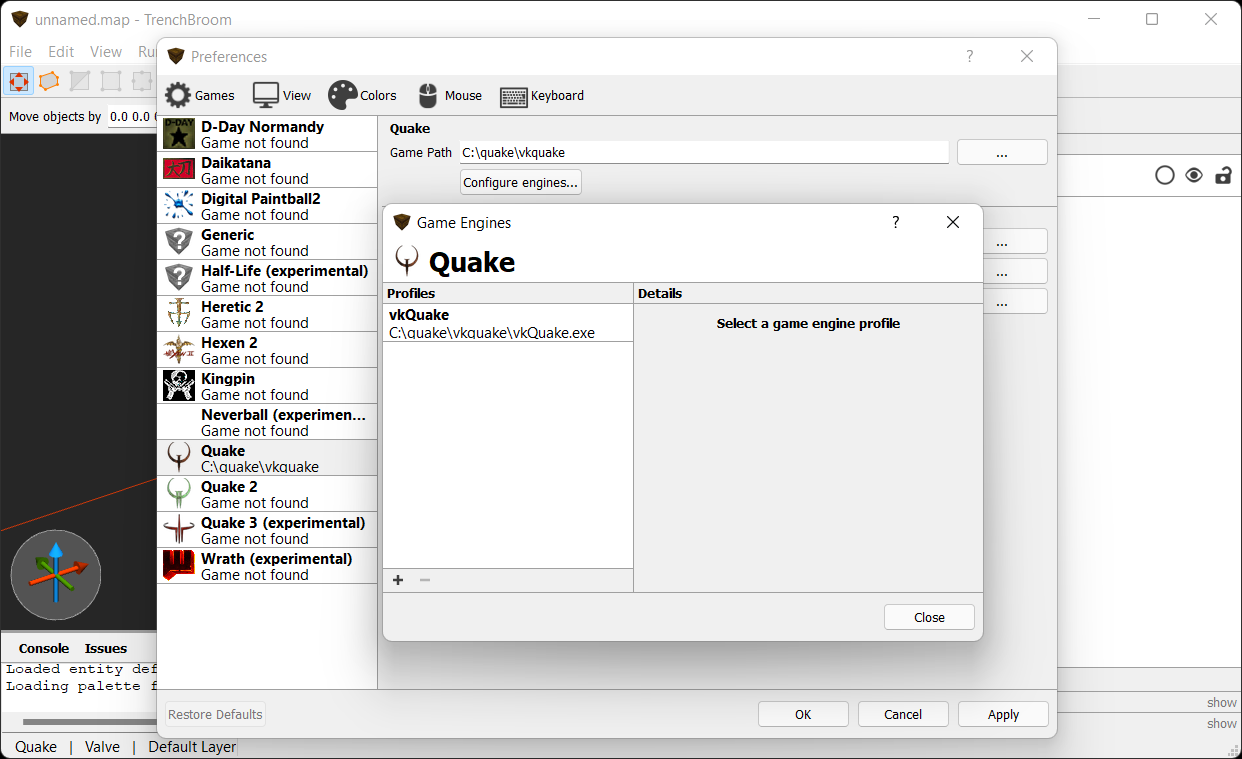
Click "Close" and "OK.
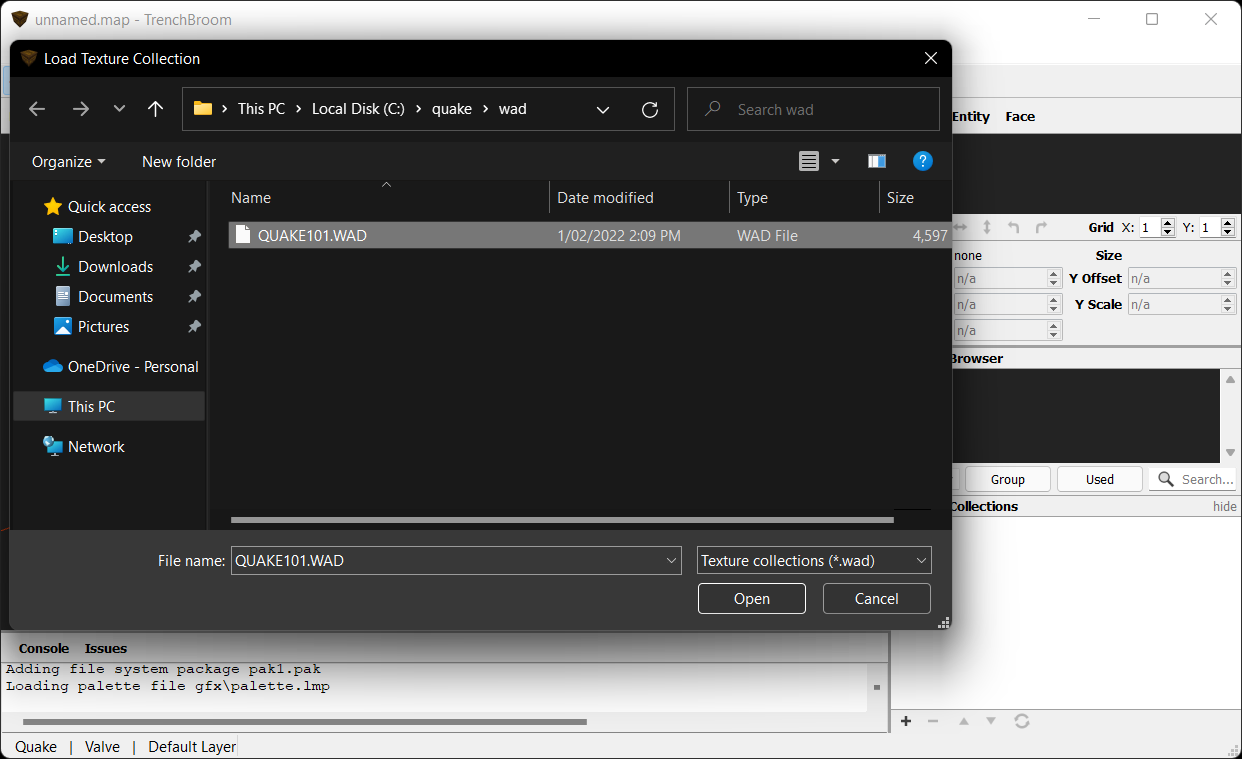
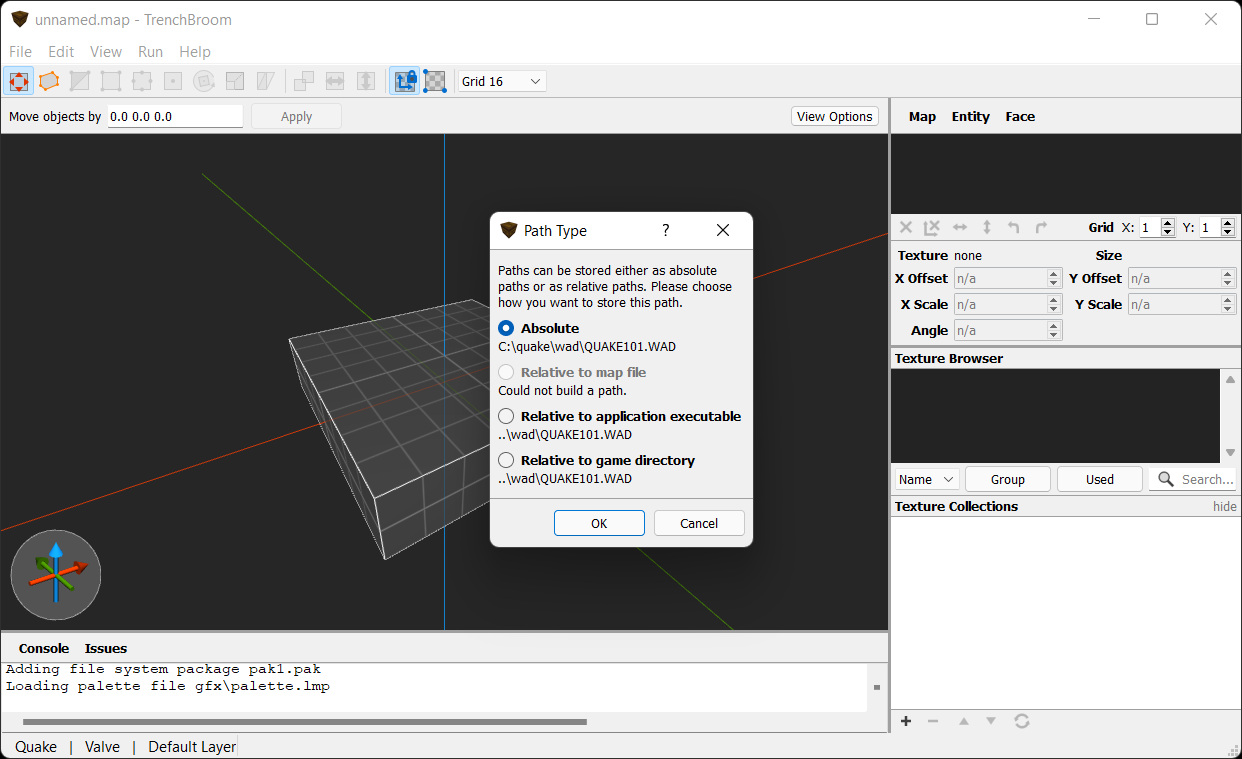
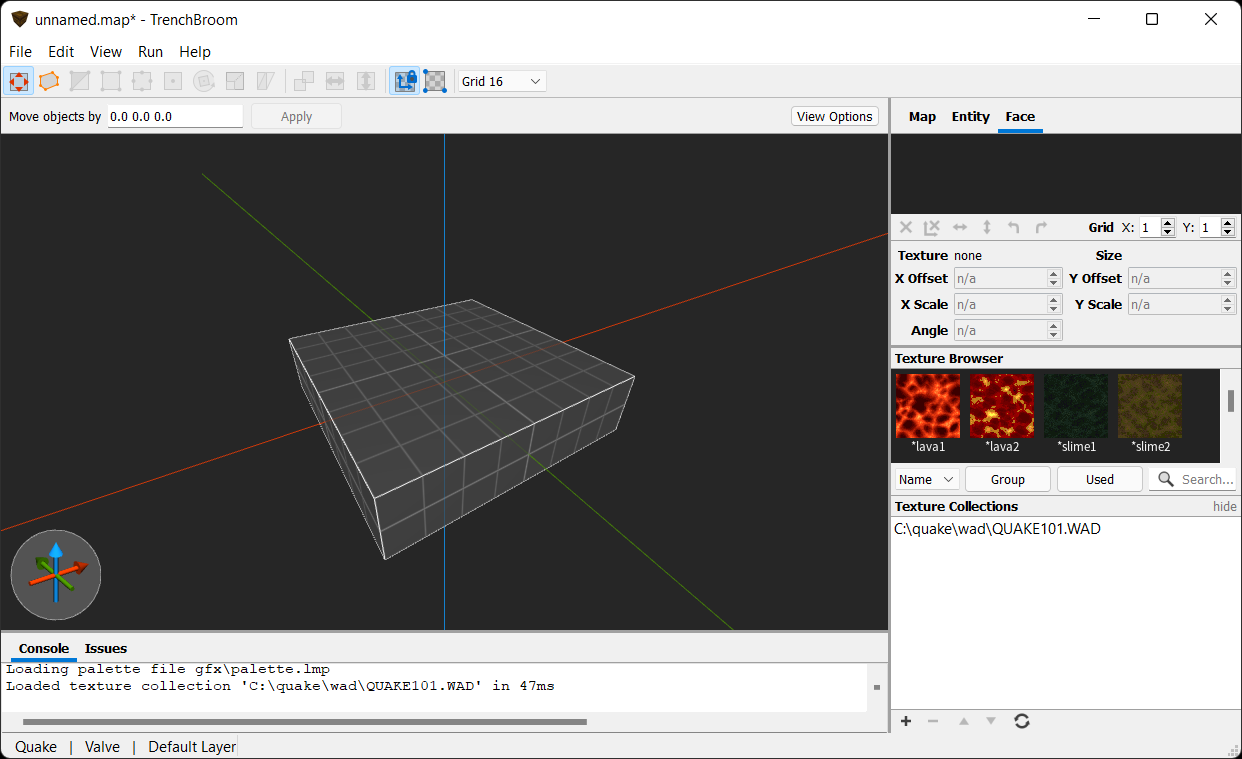
To make sure you are able to use textures on your elements, select the "Face" tab and click "+" under "Texture Collections". Browse to C:\quake\wad\, select the QUAKE101.WAD file and click "Open". Select "Absolute", but any of the other options may be viable depending on your use case. "Click OK".
Compiler configuration
Before we proceed, make sure your map is saved. Save it to C:\quake\vkquake\id1\maps.
So you can compile your maps, you now need to configure the ericw-tools compiler in TrenchBroom.
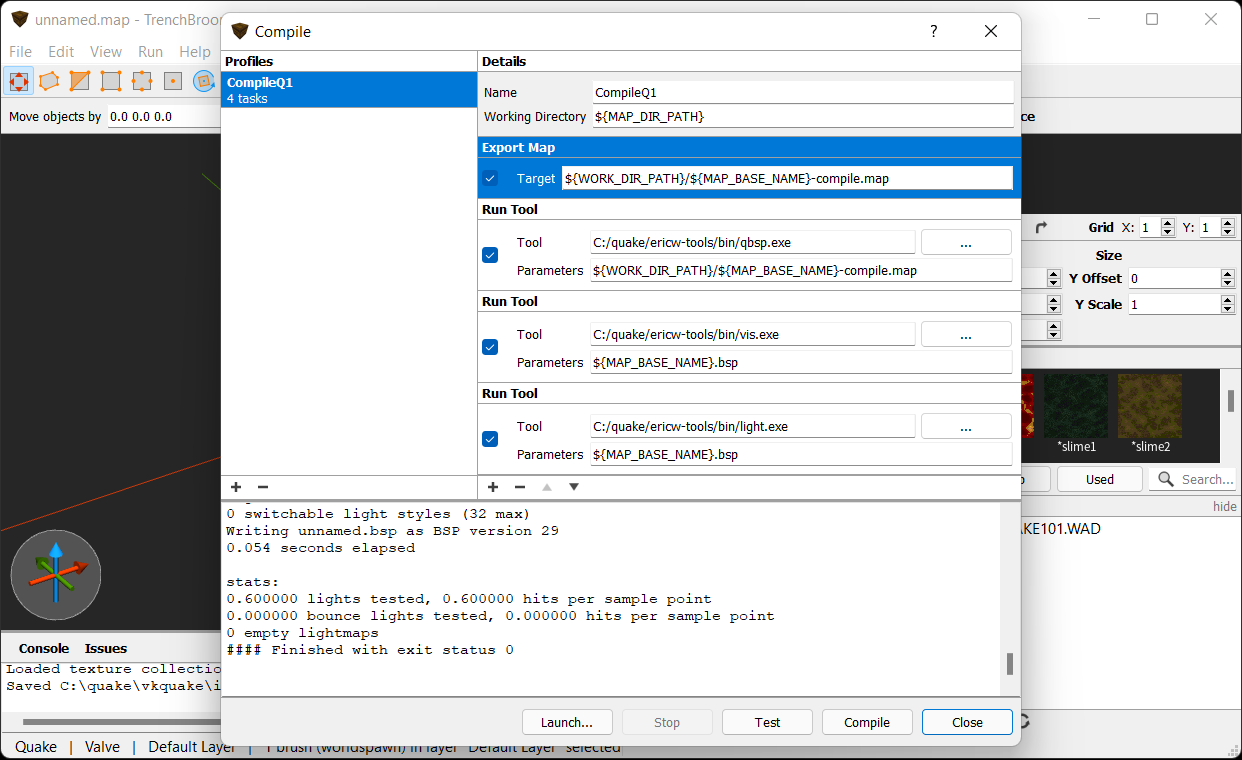
Select "Run" -> "Compile Map..."
Click "+" under profiles to create a new compile profile.
Enter in everything as detailed in the below screenshot (see the boxout for easy copy/paste).
Details
Name: CompileQ1
Working Directory: ${MAP_DIR_PATH}
Export Map
Target: ${WORK_DIR_PATH}/${MAP_BASE_NAME}-compile.map
Run Tool
Tool: C:/quake/ericw-tools/bin/qbsp.exe
Parameters: ${MAP_BASE_NAME}-compile.map ${MAP_BASE_NAME}.bsp
Run Tool
Tool: C:/quake/ericw-tools/bin/vis.exe
Parameters: ${MAP_BASE_NAME}.bsp
Run Tool
Tool: C:/quake/ericw-tools/bin/light.exe
Parameters: ${MAP_BASE_NAME}.bsp
After all the above parameters have been entered, click "Compile".
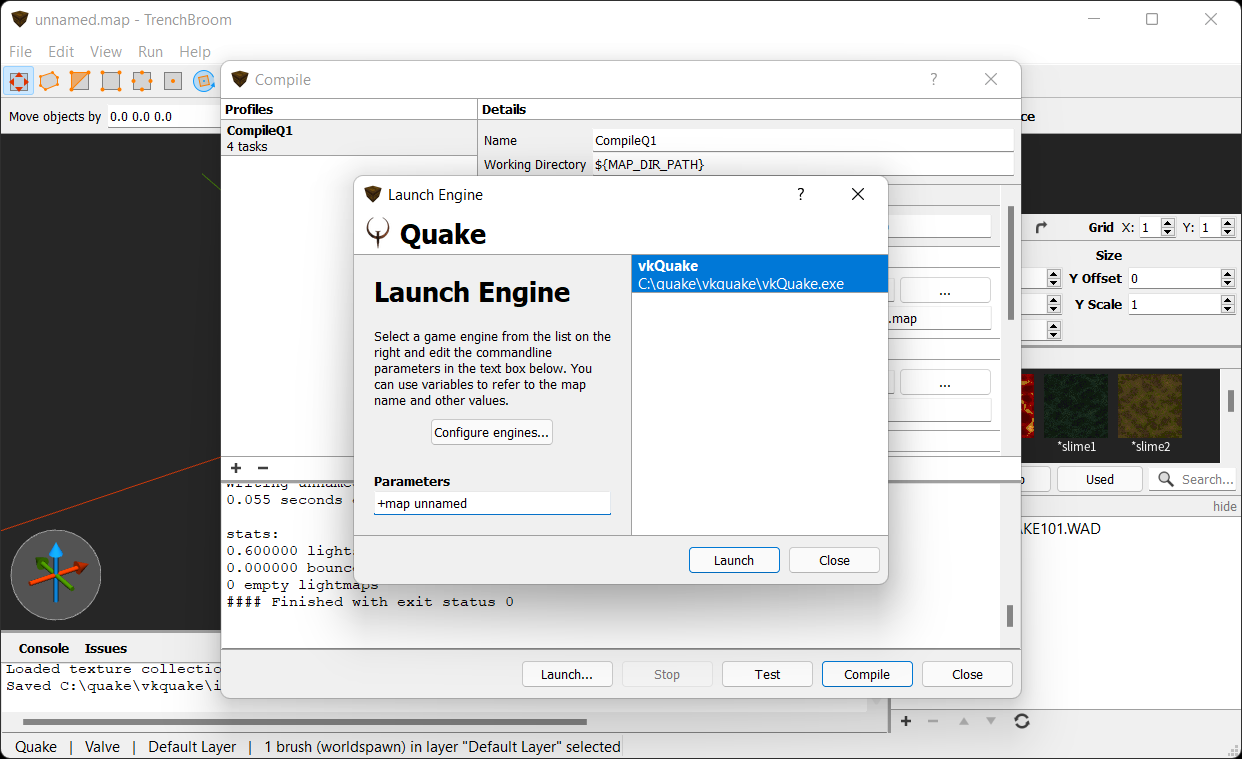
If all went well, you will now be able to play your map by clicking "Launch...".
In the Launch Engine window, ensure the vkQuake.exe file is selected, and in the "Parameters" field type "+map <mapname>".