
Setting up TrenchBroom in Ubuntu to create and compile Quake maps
This guide will show you everything involved with getting TrenchBroom up and running on Ubuntu ready to create and compile Quake maps.
Table of Contents
Intro
While there seems to be many guides and tutorials on how to set up your system to create Quake maps in Windows, there seems to be fewer guidance on how to do the same thing in a Linux environment, specifically Ubuntu.
I've therefore created this tutorial to fill the void.
This guide was created while I am running Kubuntu 19.10, but similar versions and variants of Ubuntu should be fairly similar.
A summary of the components required to download:
- TrenchBroom
- ericw-tools
- Quake .pak files from an original Quake installation
- Quakespasm
- A Quake texture WAD
Downloading everything you need and configuring your directories
Okay, let's get started. The first thing you'll want to do is create a directory on your system where you are going to start storing all of your Quake map files etc.
On my system, I have a directory location here: /home/s3thra/Quake/
But that's just me, and you can put your working directory anywhere you like.
Now go and download Quakespasm. This is the engine that you'll use to play your Quake maps after you've created them.
Go to the download page and get the Linux x86_64 package (assuming you're using 64-bit Ubuntu). The download page for Quakespasm is located here:
http://quakespasm.sourceforge.net/download.htm
Now that you've downloaded Quakespasm, extract the package contents files to the directory created at the beginning of this tutorial.
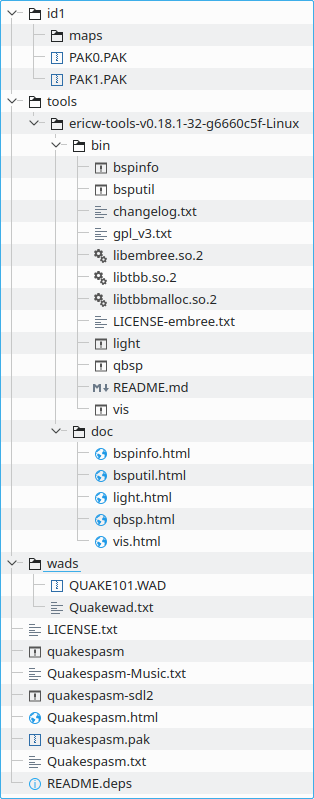
In addition to the Quakespasm files, within this directory, create the following subdirectories:
└─id1
└─maps
└─tools
└─wads
Now, we'll come back to these directories in a bit. The next thing we want to do is go and download the map compiler tools required to generate map files after we've designed them in TrenchBroom.
These tools are located here:
https://github.com/ericwa/ericw-tools/releases/
Click on the title of the latest version and download the Linux version of the ericw-tools on the next page in the .zip file. At time of writing this file was ericw-tools-v0.18.1-32-g6660c5f-Linux.zip.
Extract the contents of this archive into the tools directory that we created.
The next thing we need to get is a WAD file. A WAD file (which stands for "Where's All the Data") in Quake is a file that hold all the texture data for brushes (walls, bridges, etc.) we create. A good WAD file to start out with is one that contains all the original textures from vanilla Quake. Get that file here:
https://www.quaddicted.com/files/wads/quakewad.zip
Extract this archive to the wads directory which we created.
From your legitimate install of Quake, either from your original Quake disk or from Steam, find and copy the contents of the Id1 directory to your id1 directory. The files in question will be PAK0.PAK and PAK1.PAK.
You should be left with a directory and file structure that looks like this:
Now it's time to go and download the TrenchBroom level editor .deb installer from the GitHub repository. This can be found here:
https://github.com/kduske/TrenchBroom/releases
At the time of writing the file that you'll be looking for is TrenchBroom-Linux-v2019.6-Release.x86_64.deb, but download whatever is the latest .deb file there now.
Once downloaded, run the installer.
Setting up TrenchBroom - configuring the Quakespasm engine
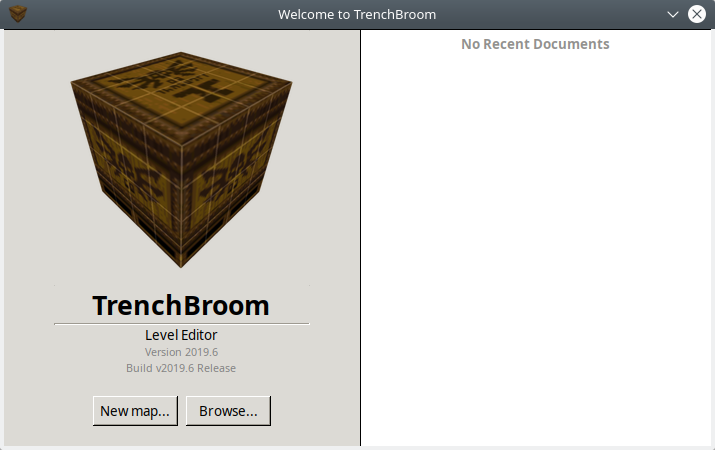
Once TrenchBroom is installed, open it.
The first screen you will be presented with is the welcome screen. Click on "New map...".
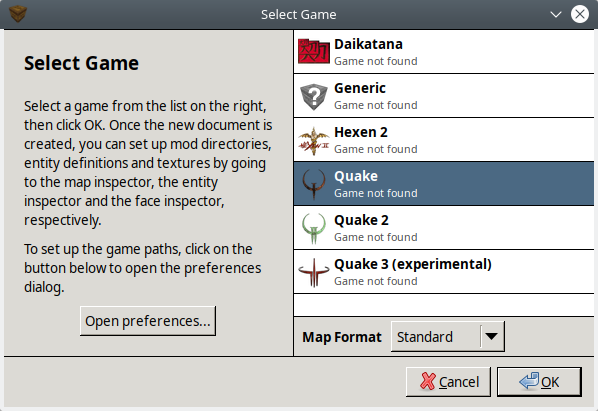
This will open up the "Select Game" window. Select "Quake" from the list in the right hand column, and then click "Open preferences...".
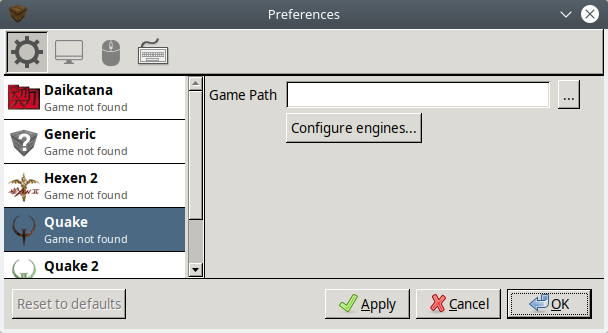
This will open the "Preferences" window. Here, select "Quake" on the left hand column, and then click on "..." to navigate to the game path.
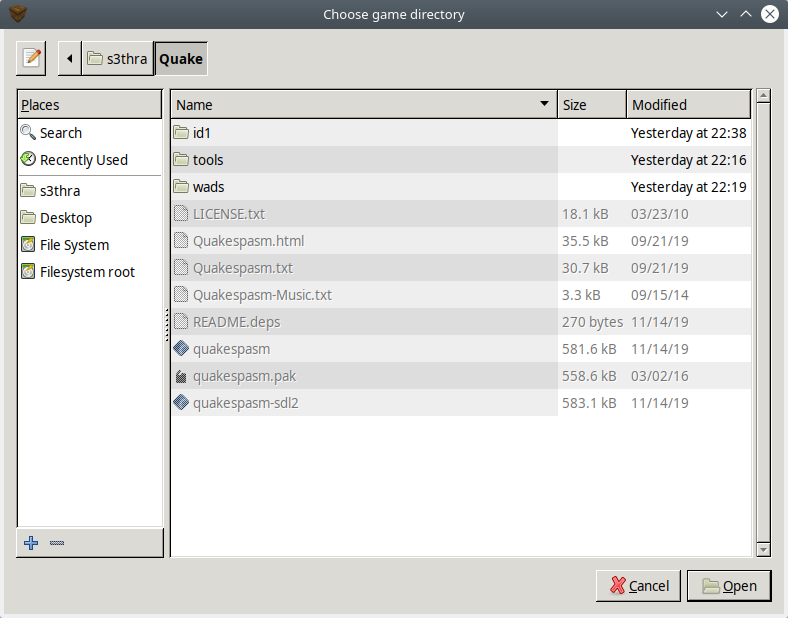
The game path will be your Quake directory that you created and extracted the Quakespasm files into. Once you have navigated to the Quake directory, click "Open".
This will bring you back to the "Preferences" window.
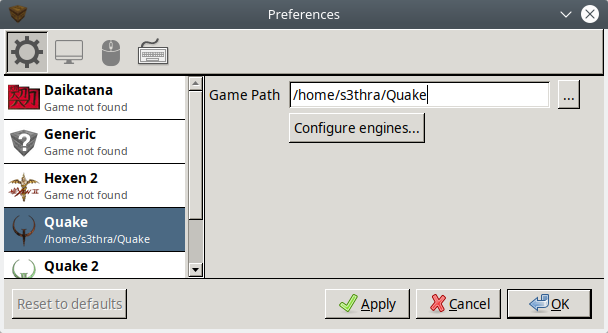
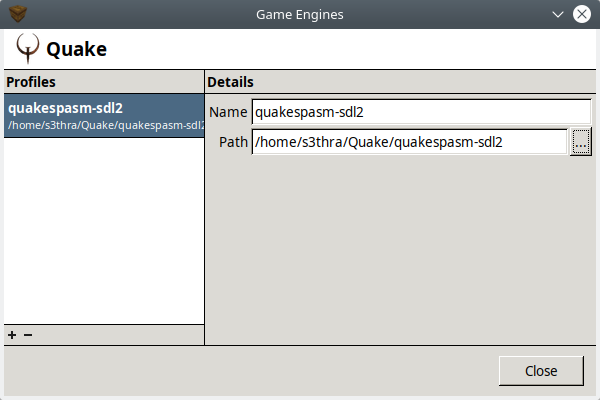
Now click on "Configure engines...".
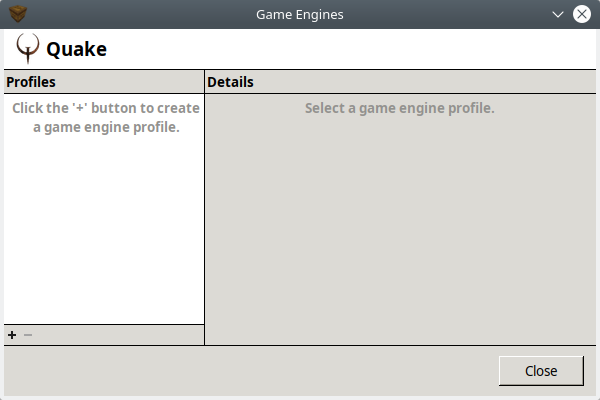
This will open the "Game Engines" window. At the bottom of the left hand column in this Window, click the "+" symbol.
Click "..." next to the "Path" field and browse to your Quake directory again.
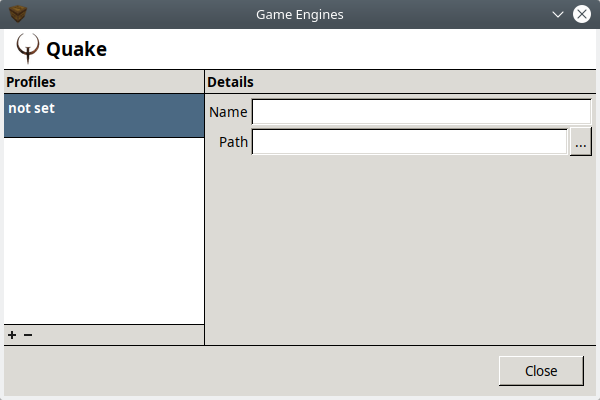
Select "quakespasm-sdl2" and click "Open".

Click "Close", "OK", and "OK" again.
Now you will be presented with the main screen of TrenchBroom with a blank map!
Setting up TrenchBroom - configuring the ericw-tools compiler
Now that you have opened TrenchBroom, save the blank map into your Quake/id1/maps/ directory.
Once we've saved the map, we can now configure the compiler by going to "Run -> Compile".
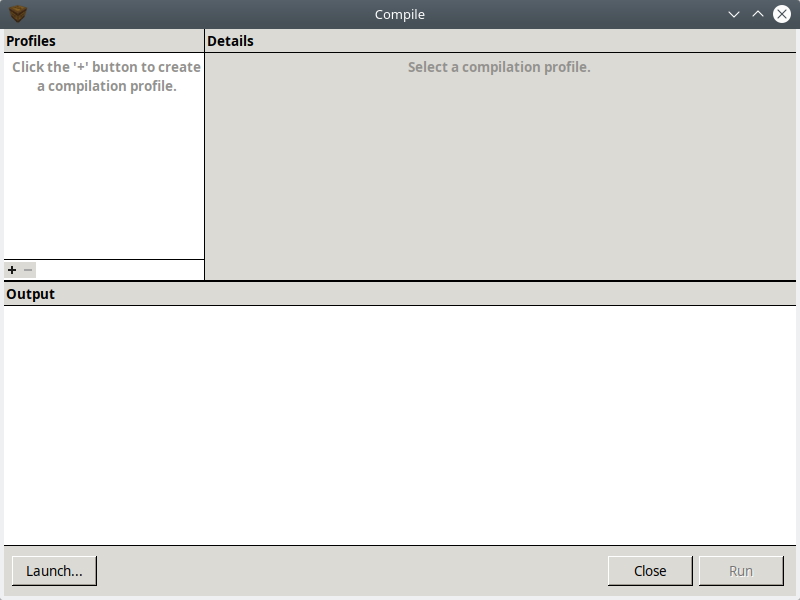
Click the "+" symbol in the bottom left of the Compile window to create a new compile task. Name this job "Compile", and add the parameters as shown in the following screenshot. Note that your paths will need to reflect your working Quake directory.
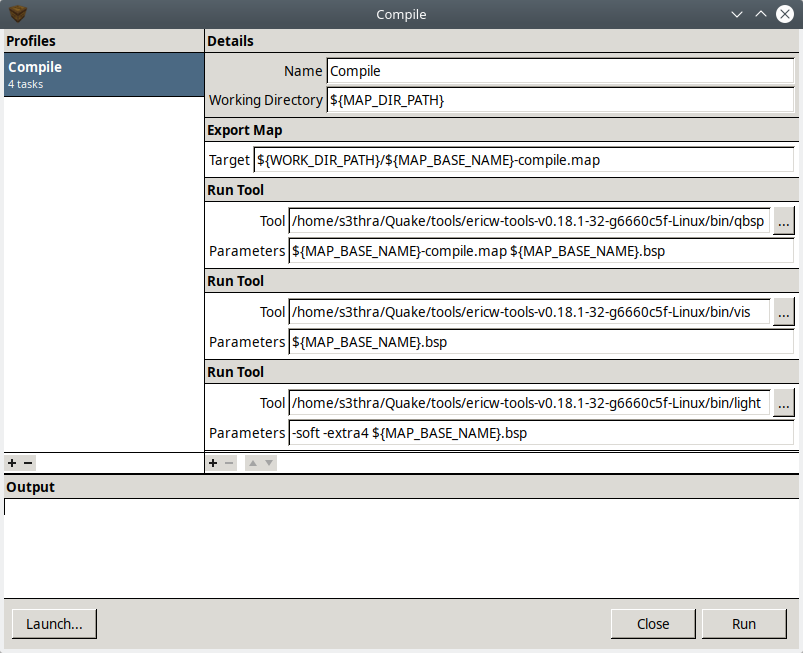
Once you've set up all your jobs in the Compile window, now you can click on "Run" to compile the map.
After this, click on "Launch..." to bring up the "Launch Engine" window. You will have already configured Quakespasm in an earlier step as your Quake engine, so now all you need to do is enter in the correct parameter so it launches your newly compiled map.
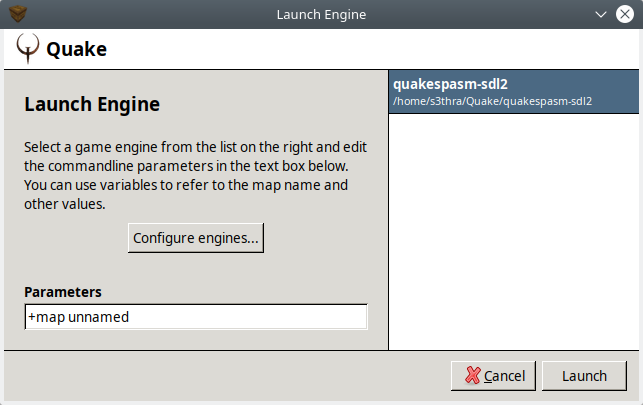
In the "Parameters" field, enter, noting that you need to change "unnamed" to whatever you have saved your map file as:
+map unnamed
And then click launch to run your map!
Setting up TrenchBroom - configuring textures
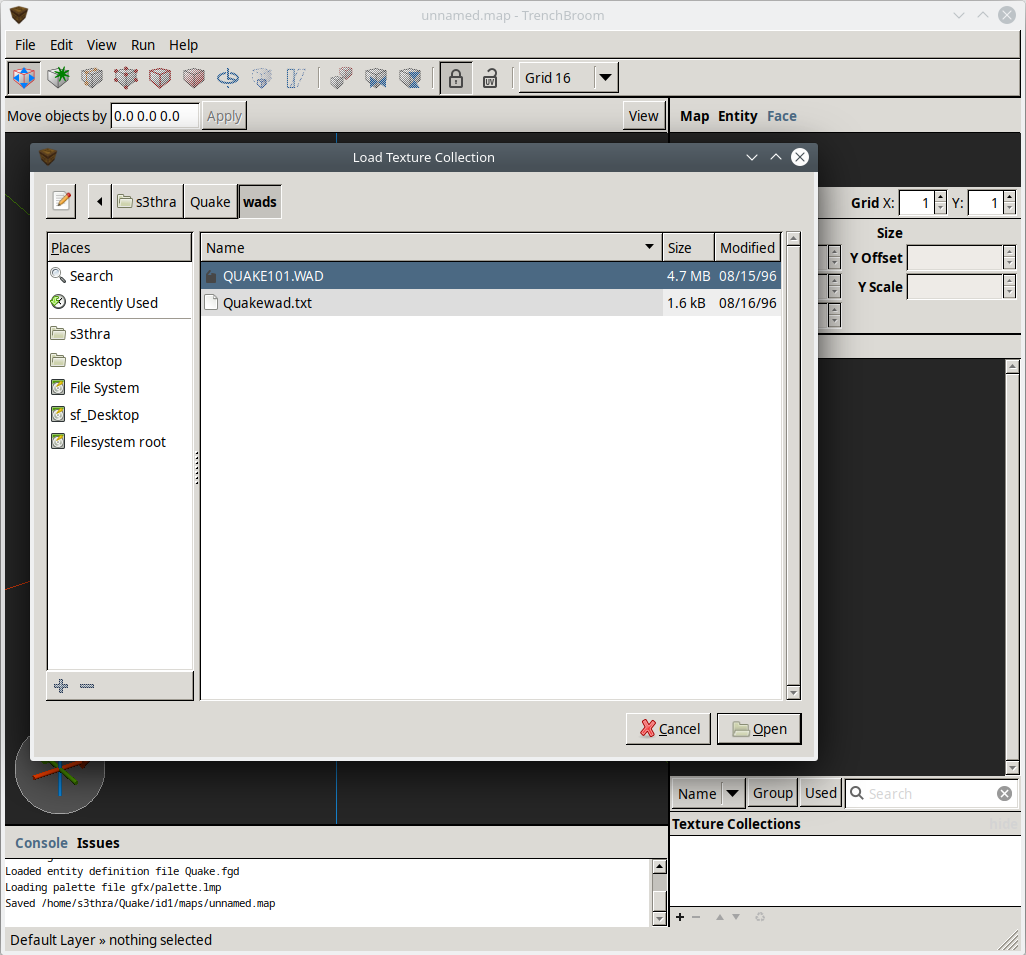
In order for you to be able give your brushes textures, you'll need to point TrenchBroom to a texture collection per map that you create.
In TrenchBroom, in the right hand column of the window, click on "Face". Now down the bottom of this column, click on "Texture Collections", and then click on the "+" symbol.
Select the QUAKE.WAD file in your Quake/wads/ directory.
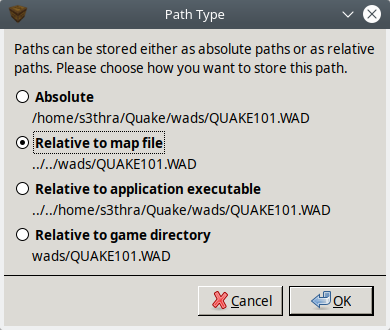
The "Path Type" window will now display asking how you want to refer to the WAD file in relation to your map. Selecting "Relative to map file" will allow you to move your Quake directory at a later stage and not worry about configuring this setting again.
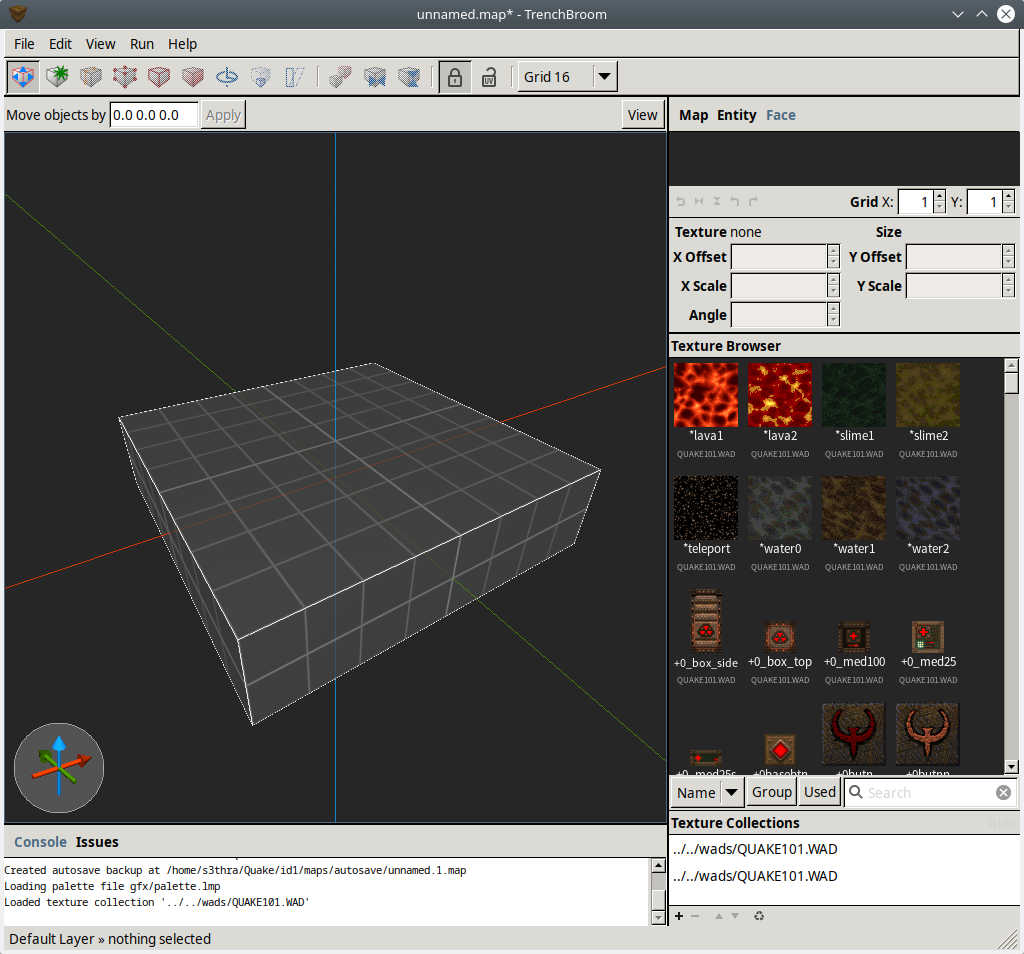
Now you have your textures set up in your TrenchBroom map!
Now you're all set up and ready to make Quake maps using TrenchBroom in Ubuntu. My suggestion if you haven't become familiar with TrenchBroom yet is to read the manual (Yes, I know, but it does help. Just dedicate a couple of hours to go through it and, trust me, it will be worth it.). Then go pay a visit to the dumptruck_ds YouTube channel to pick up some tips and tricks.
Most of all though, enjoy the freedom of creating Quake maps and let your creative juices flow!